
Who doesn’t love a little DIY organization?? Let’s make some DIY pantry labels with Cricut! I recently moved into a new home, and I needed a new system for my spices. I love how they turned out and can’t wait to share!
If you have never used the writing feature on your Cricut before, I will be showing you everything you need to know!
Watch
Check out my in-depth YouTube tutorial, where I share exactly how to make your own DIY pantry labels using the Cricut pens.
Supplies
- Cricut Maker, Cricut Explore or Cricut Joy
- Cricut Pen
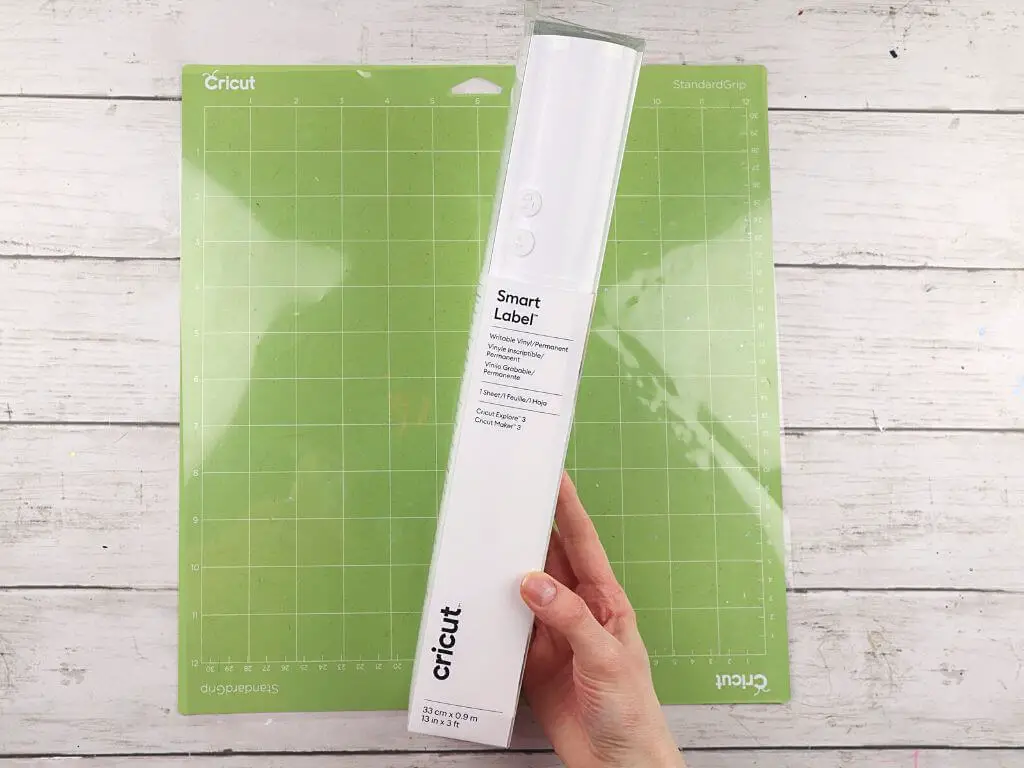
- Cricut Smart Label Writable Vinyl
- Cricut Cutting Mat
Instructions
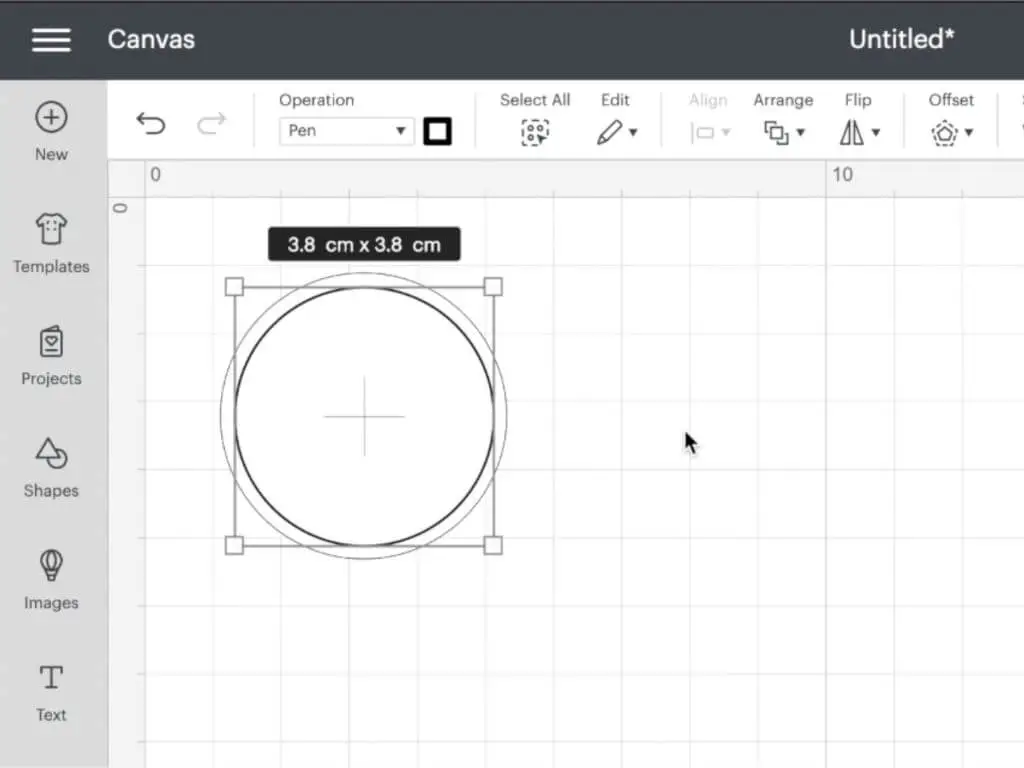
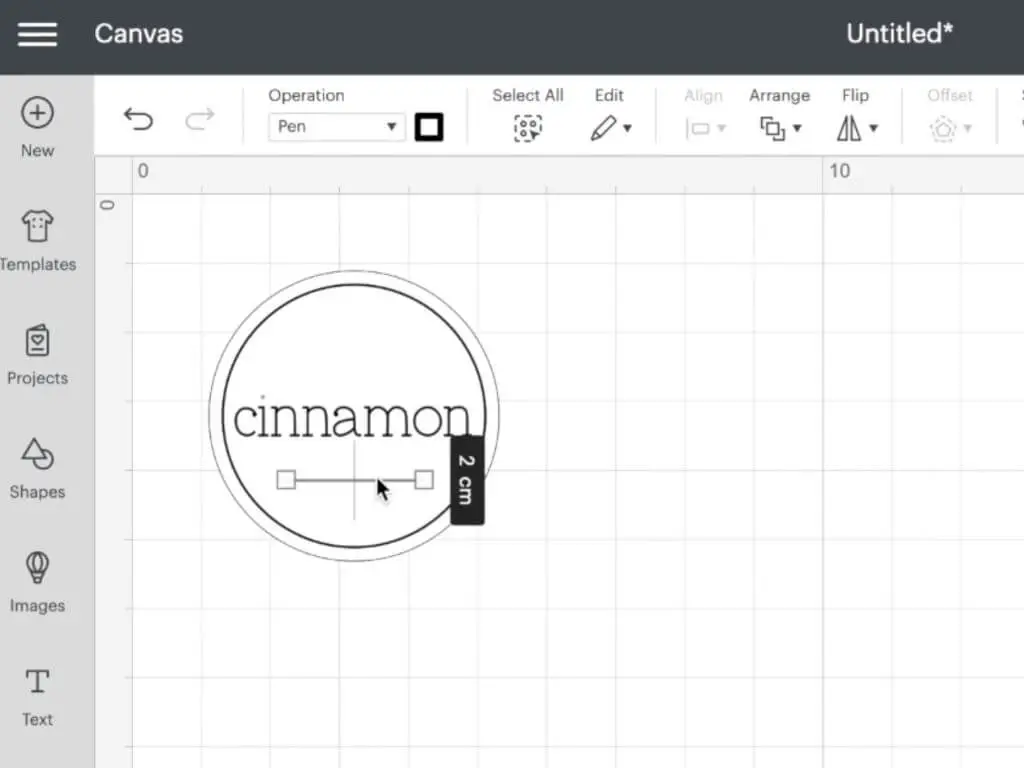
Start by opening Cricut Design Space and inserting a circle using the shapes tab. The size of your circle will depend on the size of label you are making.
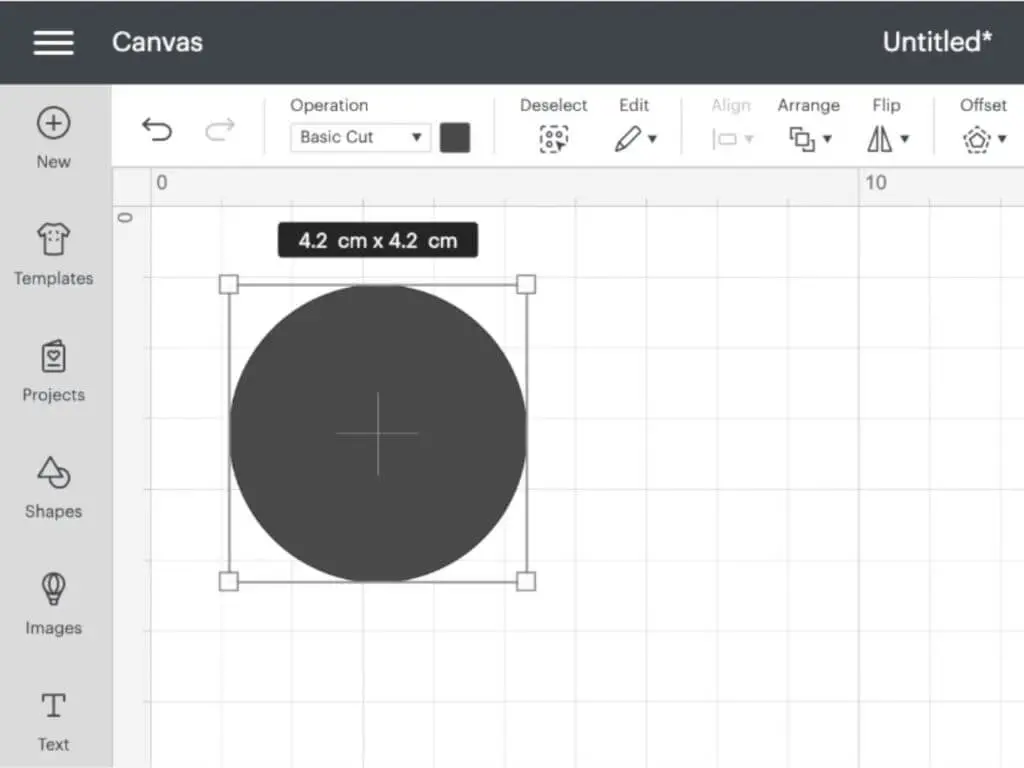
I changed the colour of the circle to white since that is the colour vinyl I am using.
I then created another circle and made it smaller than the first one so it fit inside with a smaller border around the edge.
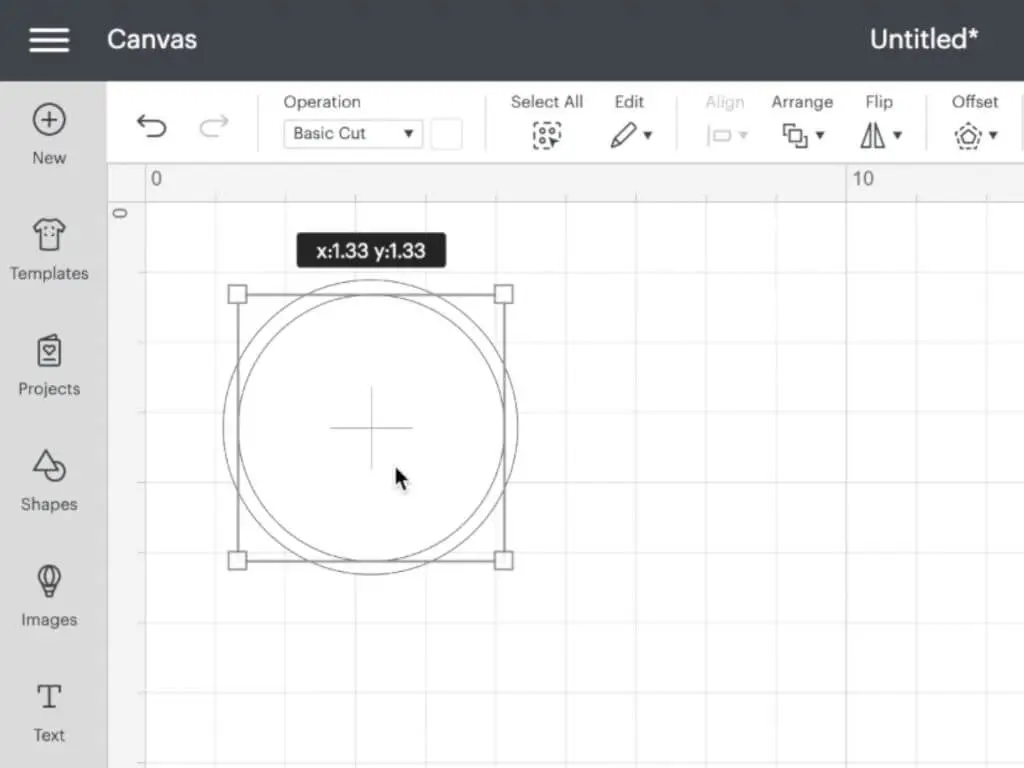
WIth the second smaller circle selected, change the operation from basic cut to pen. This tells the Cricut to draw this part of the design with the pen instead of cutting it out.
You will see the circle changes to a slightly darker, thicker line.

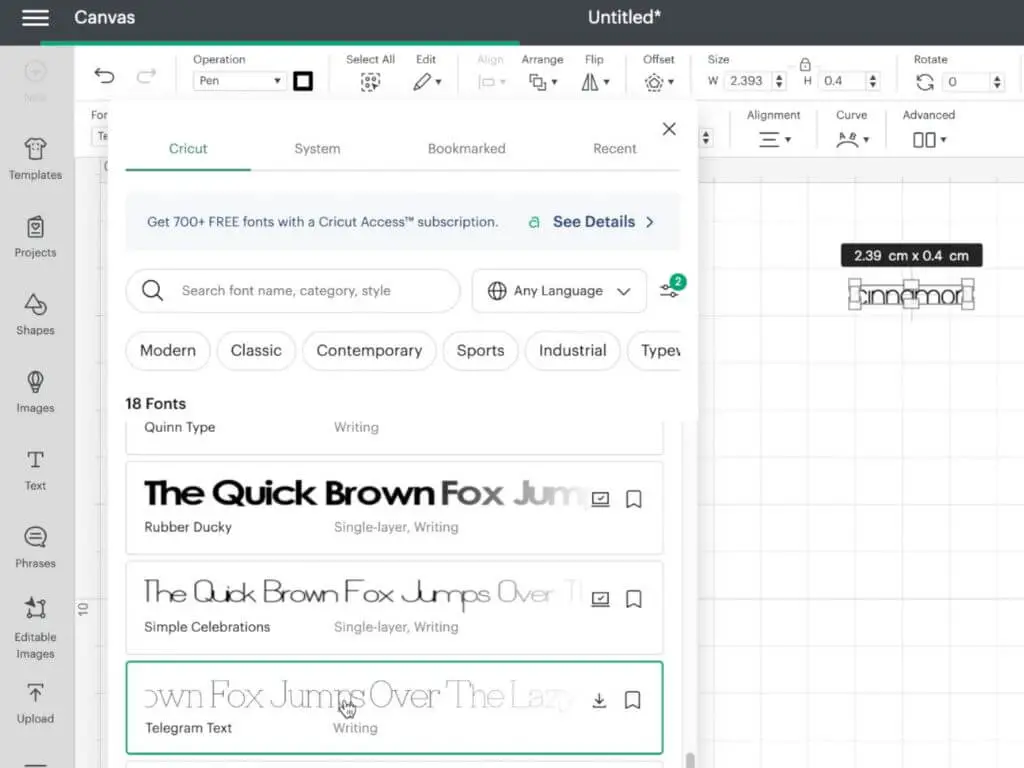
Next I’m adding text for my spice jar label. I sorted for free writing fonts in Cricut Design Space and chose Telegram Text. With the text selected, change the style to writing. This menu is next to the font menu.
I then aligned the word cinnamon to the center of the circles using the align menu.
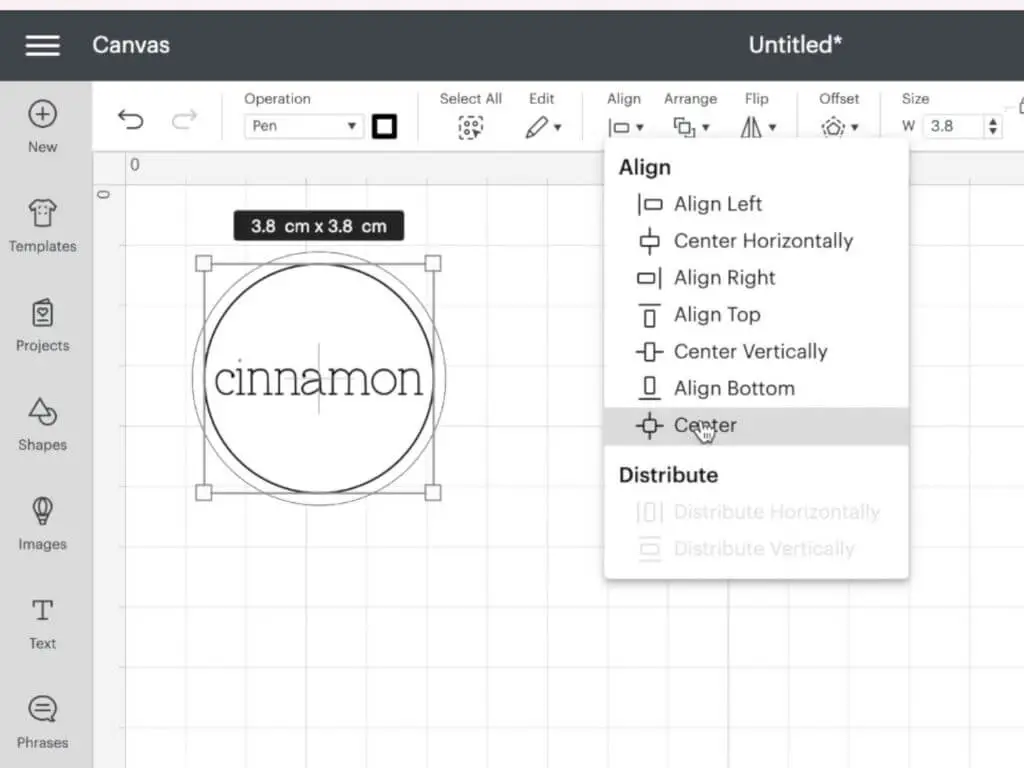
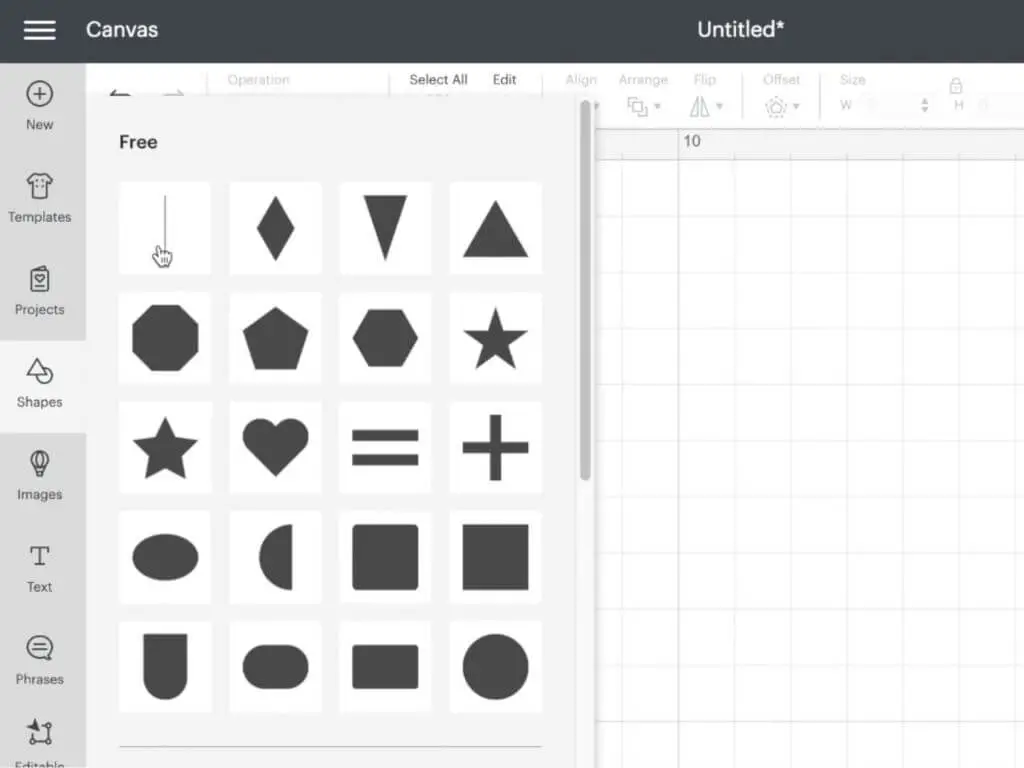
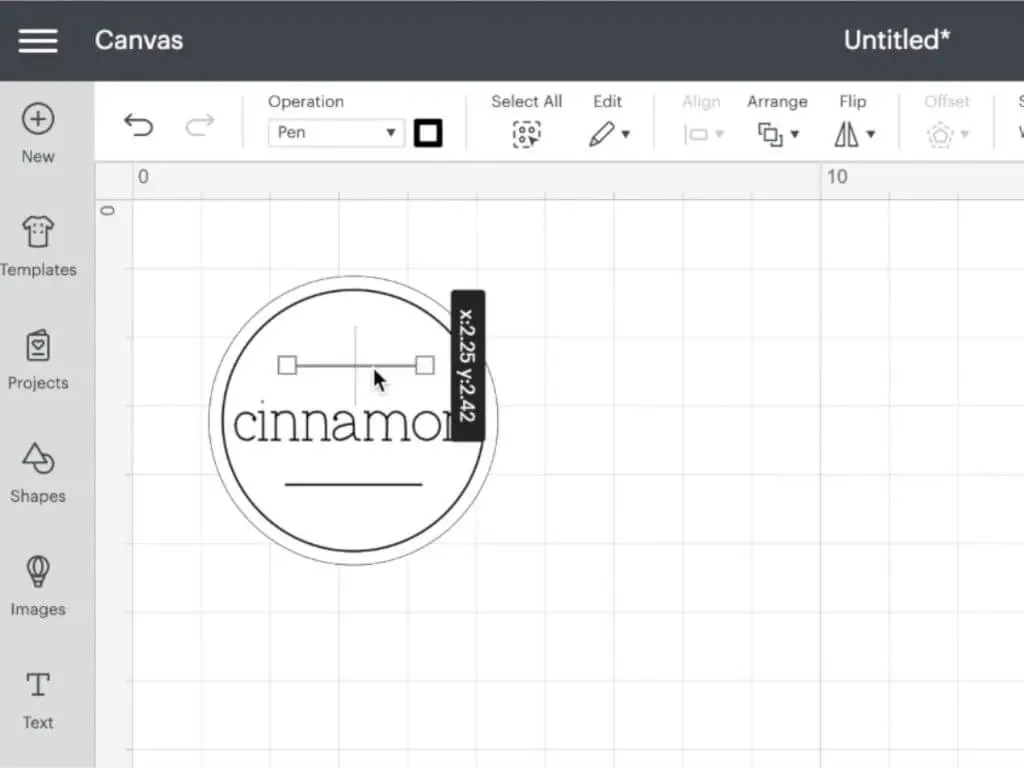
Select the line shape from the shape section and change the operation from score to pen.
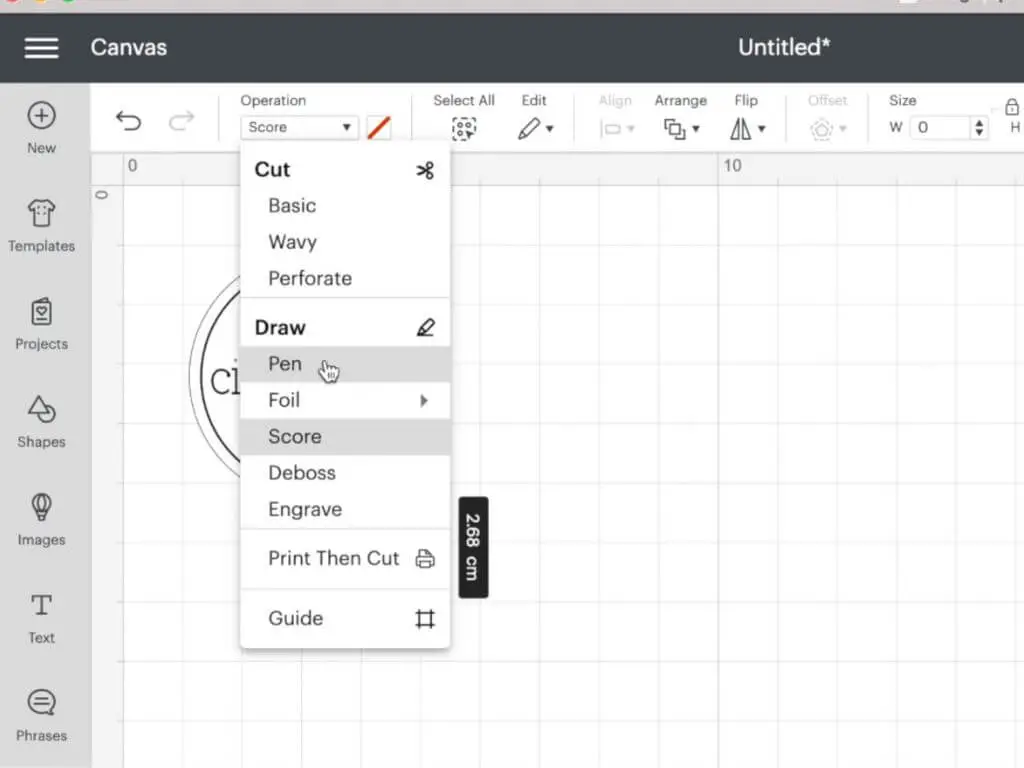
I rotated the line and placed it under the word cinnamon, then duplicated it and added another line above the word.
Once it is all aligned and in place, select everything and click attach.
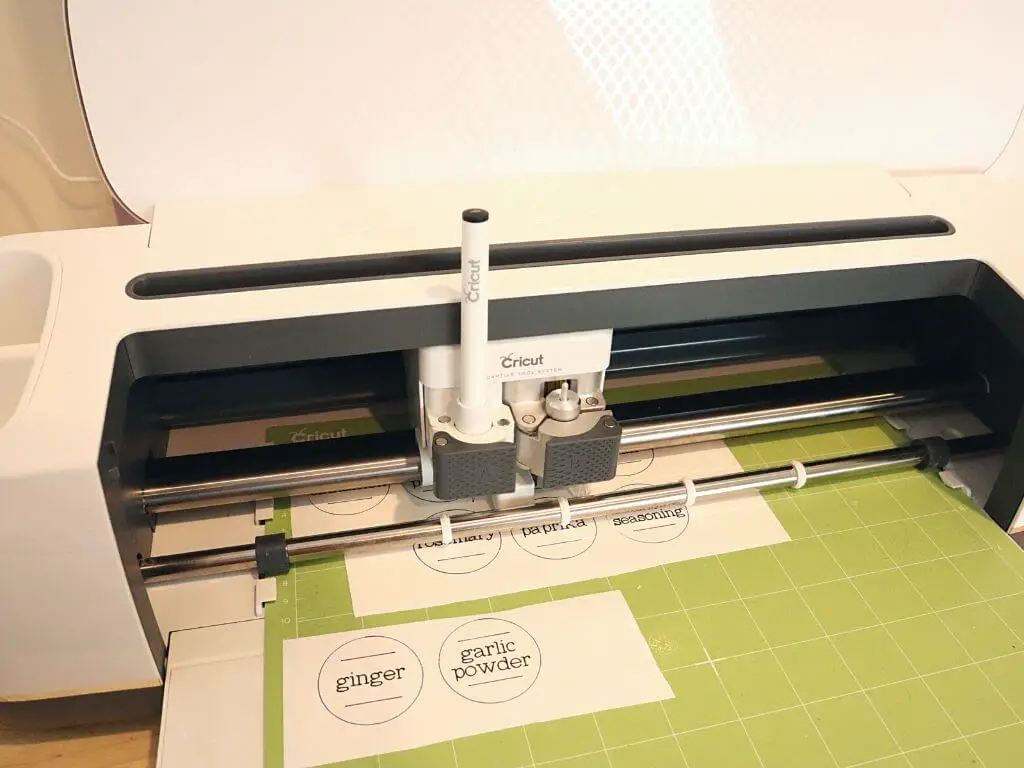
To make the DIY spice jar labels, I am using Cricut writable smart vinyl. This vinyl can be used with the Cricut Maker, Cricut Maker 3, Explore Air 2 and the Explore 3. The only difference is if you are using the Cricut Maker or the Explore Air 2 you will need to use a mat with it.
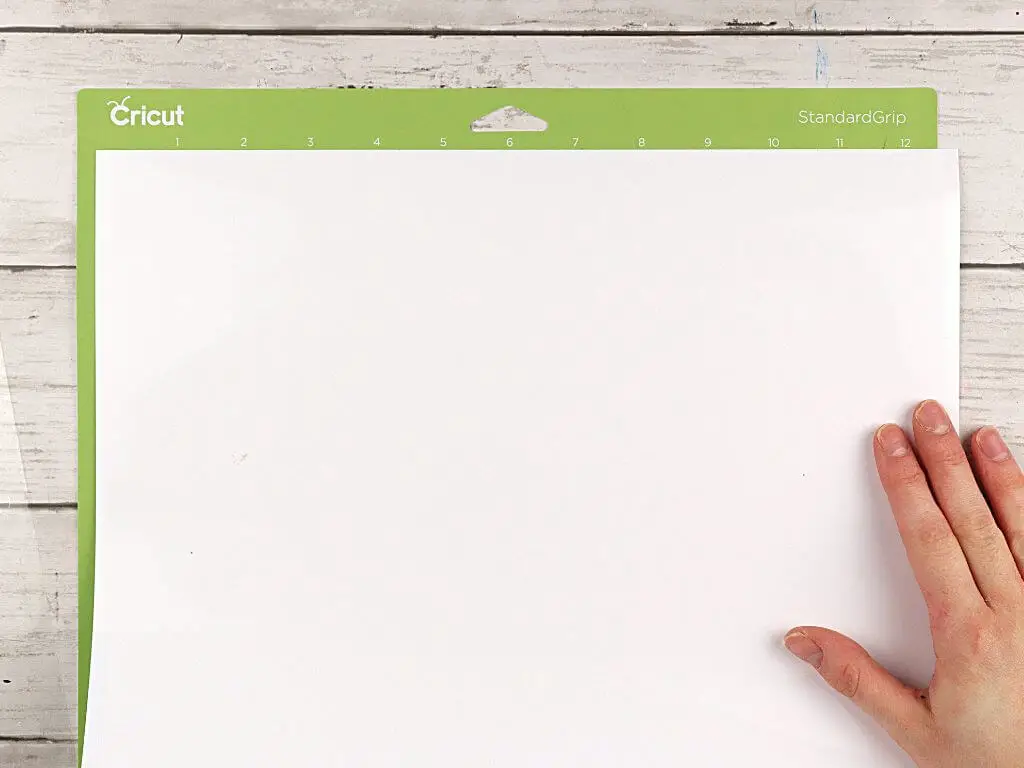
It is difficult to see in the photos, but this smart vinyl has a thin border on either side of it. When you are lining it up on the mat, be sure to line up the edge of the vinyl with the grid on the mat. I also trimmed the vinyl down to be the size I needed for my labels.
If you are using the Maker 3 or the Explore 3 you will not have to worry about lining up the vinyl since you do not have to use a mat with the smart vinyl.

Load the Cricut pen into clamp A of the Cricut, then click Make It on Design Space. The Cricut will write all the labels first, then go over back with the blade to cut out the stickers.
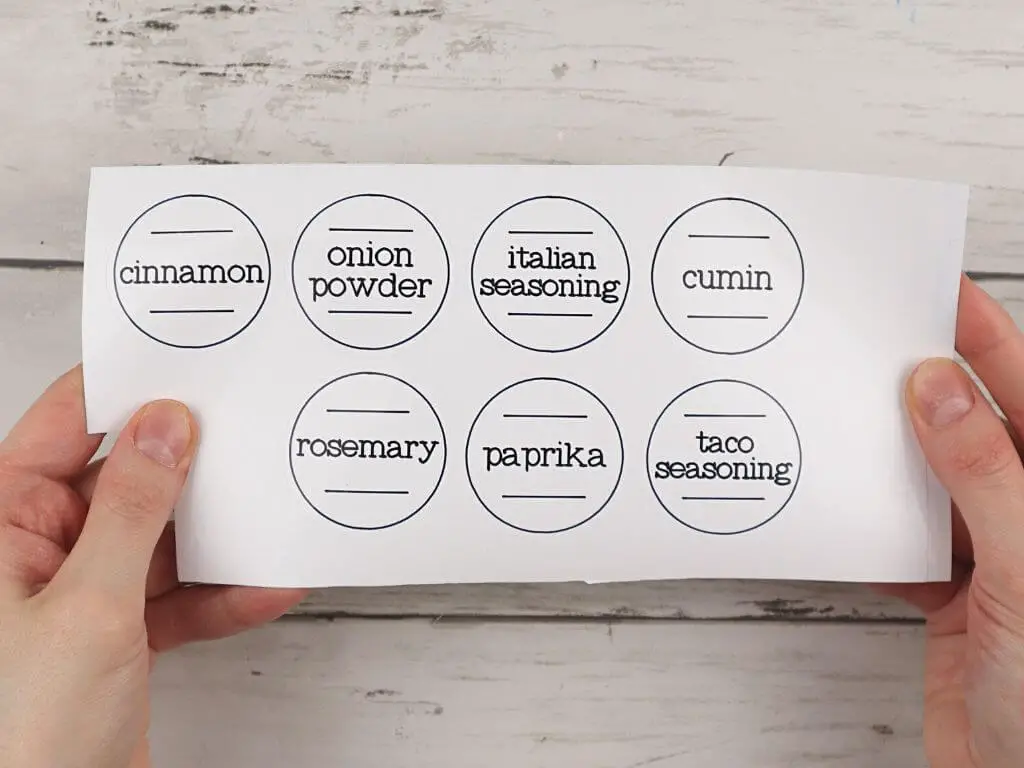
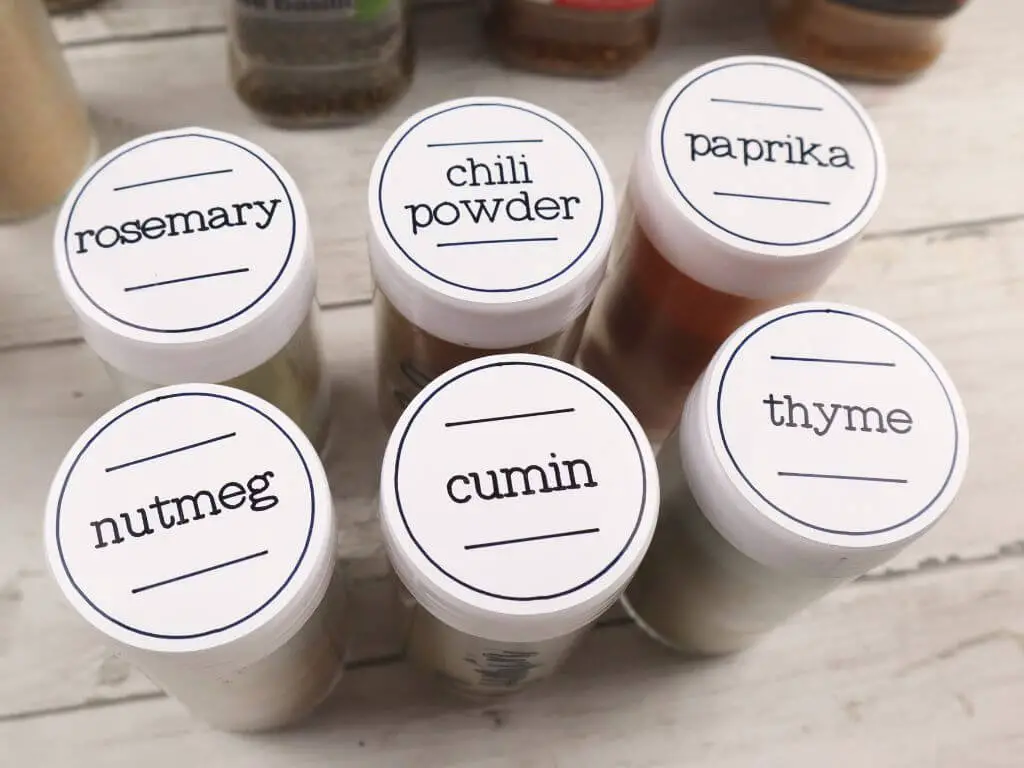
Once the Cricut finishes writing and cutting out all the labels, you have your finished sheet of stickers!
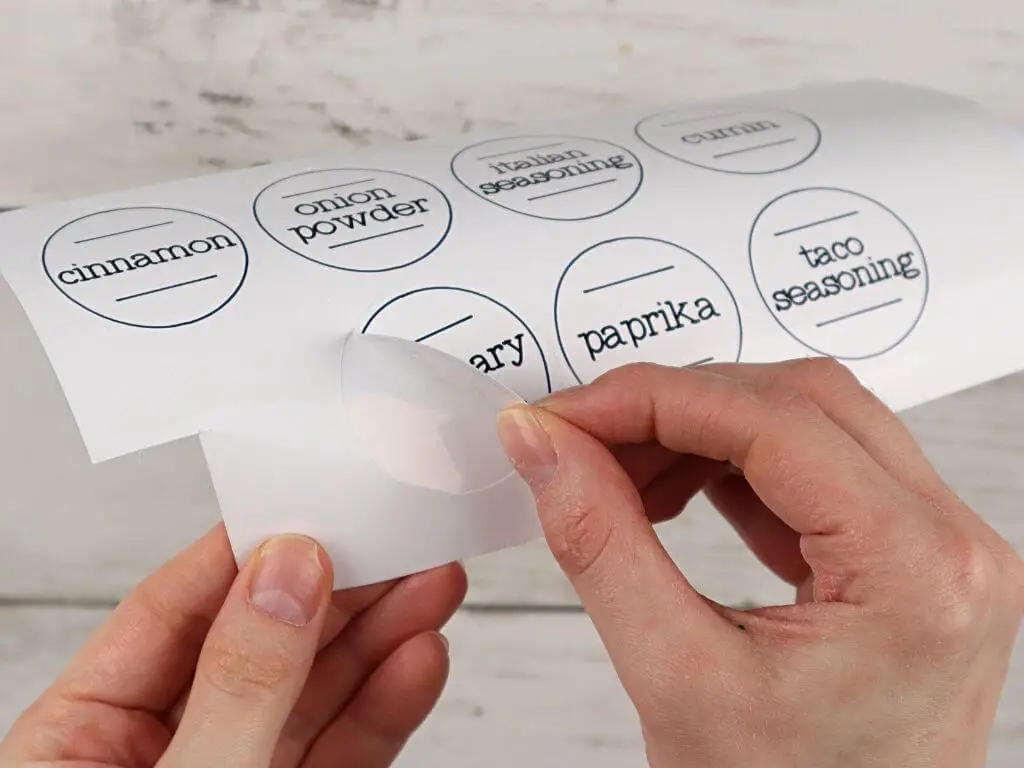
Now all you have to do is peel off the stickers and stick them onto your spice jars or whatever it is you are labeling.
What I love so much about this smart writable vinyl is there is no weeding involved! They peel off the sheet so easily. I will say, make sure to wait a little bit before touching the ink. I started peeling some of them too soon, and they did smudge a bit.
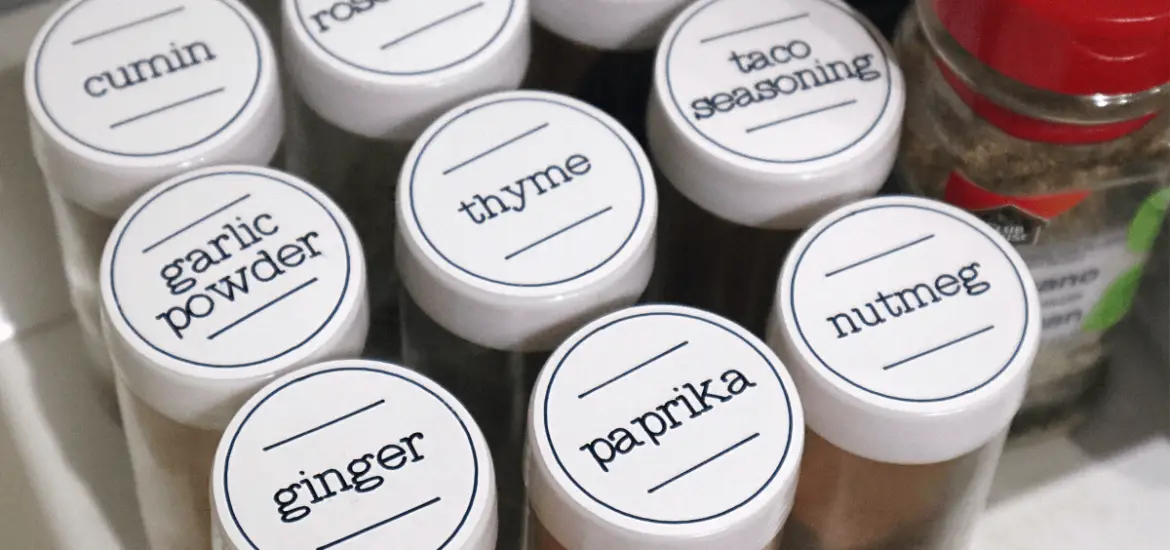
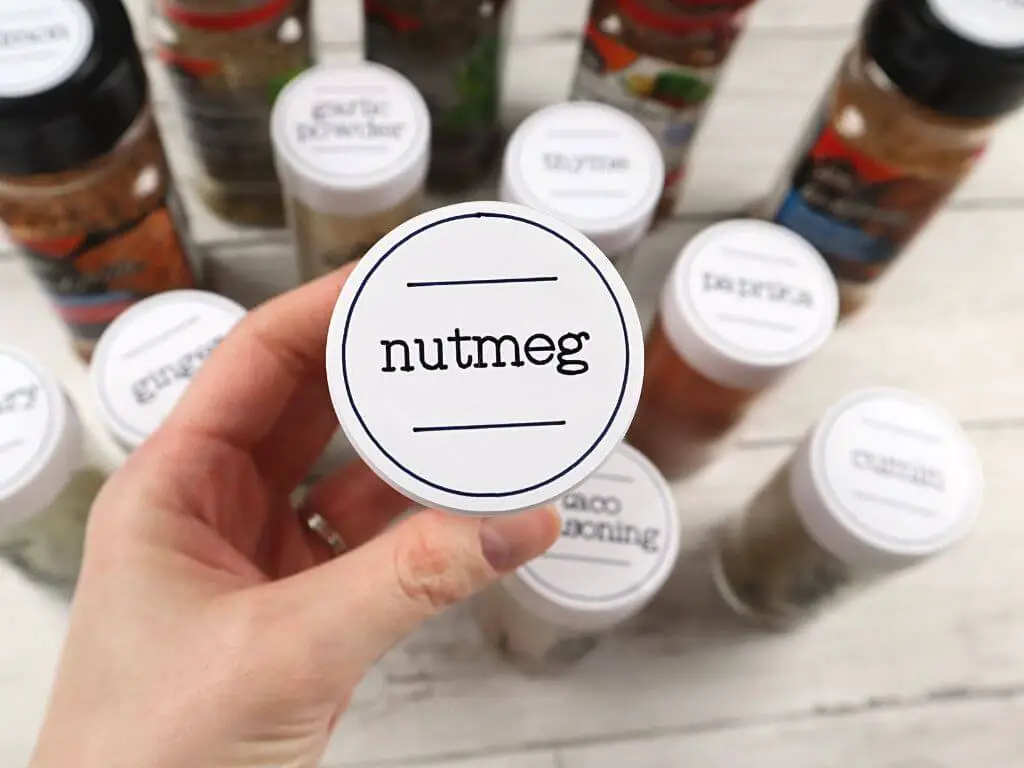
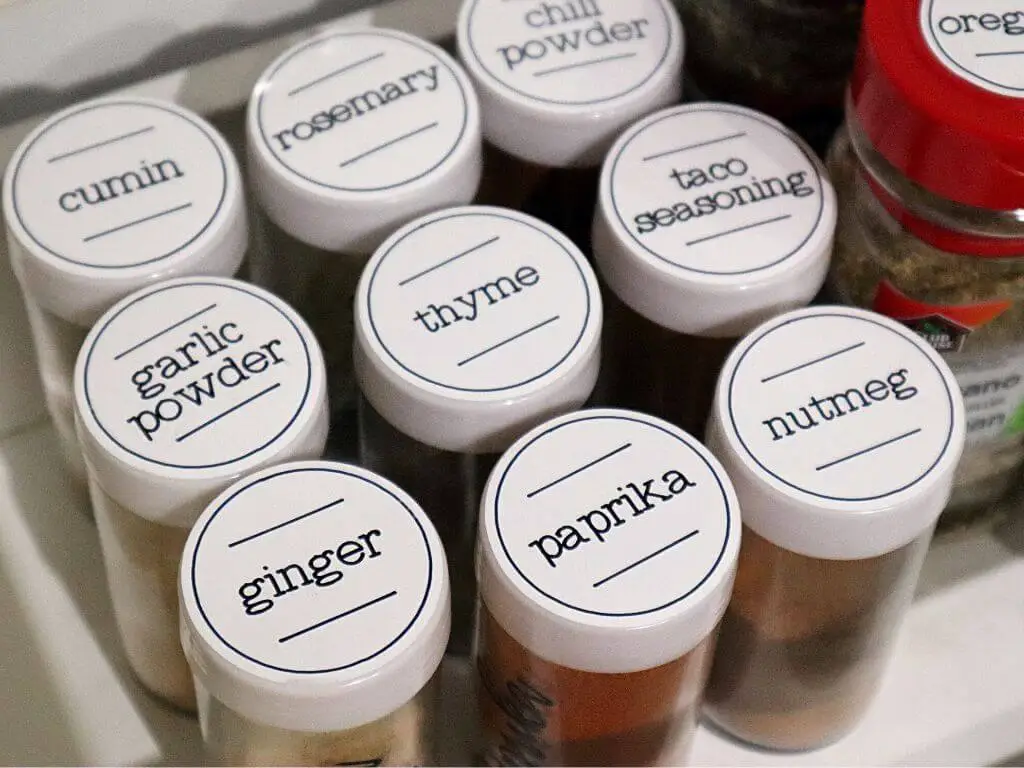
Here are the finished labels! I love how these turned out so much. They look so nice in my spice drawer! I especially love that I didn’t have to weed out all these tiny letters!
Thank you so much for checking out this tutorial!
Make sure to watch my YouTube video for a more in-depth look at how to make these DIY pantry labels and subscribe to my channel for more!
If you need more pantry organization inspiration, I have another Cricut tutorial for you. 2021 I shared a post on how I made DIY pantry labels with my Cricut, and since then the video has gotten more than 100,000 views!
xo,
Andrea